Chapter 5. Hello Extension
Hello User Extension
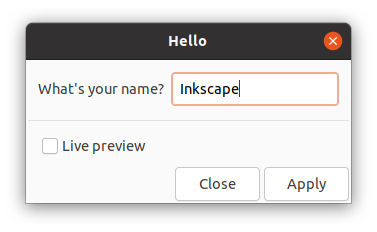
We have enough discussion on the Triangle extension. Let’s create a Hello
user extension modeled after the Triangle. The extension has one input
text field that we can enter a name. After clicking the Apply button,
the extension will output Hello <name> to the current drawing.
The hello.inx and hello.py files are saved under the user extension directory.
Hello.inx File
The Hello.inx file is very similar to the Triangle.inx as we discussed before.
In fact we make a copy of the Triangle.inx file and modify it. Now we can click
Extensions -> Custom -> Hello menu to launch the extension.
<?xml version="1.0" encoding="UTF-8"?>
<inkscape-extension
    xmlns="http://www.inkscape.org/namespace/inkscape/extension">
    <name>Hello</name>
    <id>user.hello</id>
    <param name="name" type="string"
        gui-text="What's your name? ">Inkscape</param>
    <effect>
        <object-type>all</object-type>
        <effects-menu>
            <submenu name="Custom"/>
        </effects-menu>
    </effect>
    <script>
        <command location="inx" interpreter="python">hello.py</command>
    </script>
</inkscape-extension>
Python Hello.py Code
The hello.py file also doesn’t have much new code than in triangle.py.
The add_text method is modified from another system extension module path_number_node.py.
It creates a TextElement and sets the text and style attributes. The
element is then added onto the current layer via the layer.add method.
The Triangle extension discussed in previous chapters essentially does
the same thing. It creates an PathElement, and then the element is added to
the current layer.
import inkex
from inkex import TextElement

class Hello(inkex.EffectExtension):
    def add_arguments(self, pars):
        pars.add_argument('--name', type=str, default='Inkscape',
            dest='name', help="name input")

    def effect(self):
        name = 'Hello ' + self.options.name
        layer = self.svg.get_current_layer()
        x = self.svg.unittouu('40px')
        y = x
        layer.add(self.add_text(x, y, name))

    def add_text(self, x, y, text):
        """Add a text label at the given location"""
        elem = TextElement(x=str(x), y=str(y))
        elem.text = str(text)
        elem.style = {
            'font-size': self.svg.unittouu('18pt'),
            'fill-opacity': '1.0',
            'stroke': 'none',
            'font-weight': 'normal',
            'font-style': 'normal' }
        return elem

if __name__ == '__main__':
    Hello().run()
When we are working on a user extension, we can modify the Python code and
click the Apply button to run the modified code. However, if we change the
content in .inx file, we have to exit and restart Inkscape for the change to
take effect.
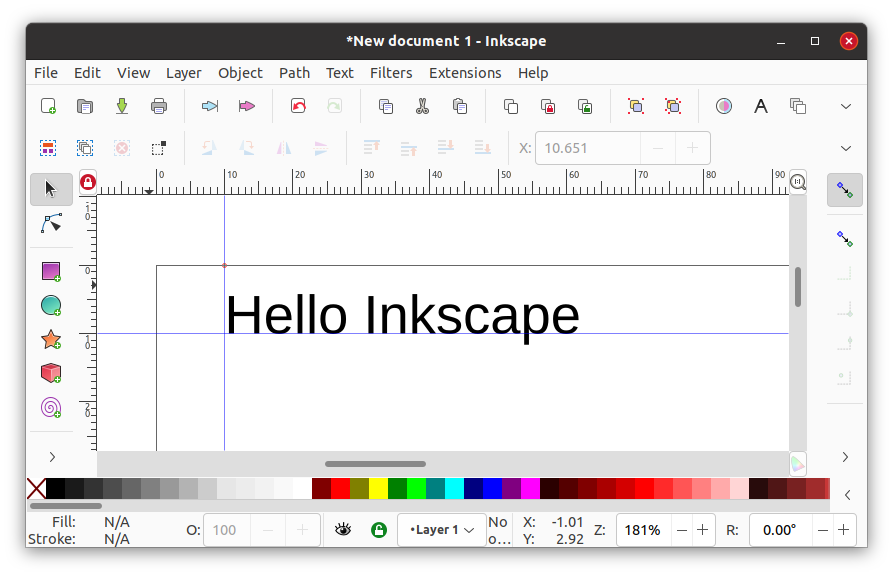
Output
Below is the result of running the extension. The origin (0, 0) of SVG coordinate system is the point on the top left corner. The x value increases from left to right, and y value increases from top to bottom. The text coordinate represents 40 pixel from left of the page, and 40 pixel down from top the page. The font size is set at 18 point.
Chapters
5. Hello Extension